

You're expecting a whole new home entertainment experience when you unbox a high-definition television, and we don’t blame you. But an HDTV isn’t self-aware: If you want the kind of visual quality that will make your friends drop their jaws the moment they walk through the front door, you’re going to have to optimize your television’s physical setup, and master either its preset display options or master its advanced display tweaks.
Thanks to built-in presents on Toshiba’s HDTVs and more advanced tools like calibration discs, you won’t have to spend more time than it takes to watch an episode of Modern Family to build your perfect picture.
The Physical Setup
You are the most important part of making your HDTV look good. The distance you sit from the set, as well as the angle you view it from, can have a direct impact on the quality of the picture.
The industry-standard recommendation for how far you should sit from your 1080p HDTV requires you to multiply your set’s screen size by 1.2 and then by 1.9 to create a minimum and maximum distance, respectively. Then want to divide each result by 12 to get the measurement in feet, and set the distance between you and your HDTV right in the middle of the two ranges.

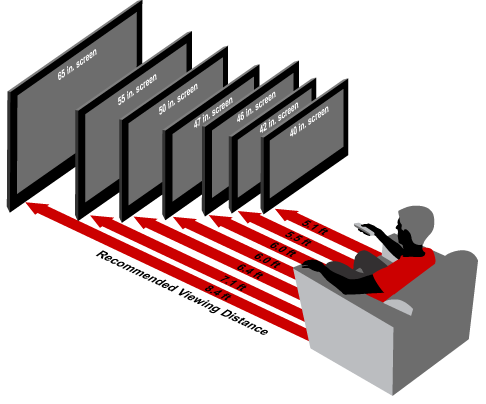
If you sit too close to your HDTV, you’ll likely see individual pixels instead of a nice, blended image. Sit too far away and you won’t be able to see the increased detail that high-def brings to your living room.
As for viewing angle, you’ll get a perfect picture when your eyes are level with the exact center of your HDTV. The angle created by the invisible sight lines from the left and right sides of your HDTV to your eyes shouldn’t be greater than 40 degrees. In other words, viewing from extreme angles will not bring you the best experience. And the effects are often even more noticeable vertically: You’ll want to create an angle between the sight lines created by the top and bottom of your HDTV and your eyes of less than 15 degrees.
Viewing images in three dimensions tends to magnify viewing-angle issues. You might have to gravitate toward to the center of your couch, for example, to reduce convergence issues with a 3D picture.
Preset Display Options
Everyone has a preference: If you just want a picture that looks good to you, the preset display configuration options on a your Toshiba HDTV give you a quick and easy way to adjust the picture to your liking.
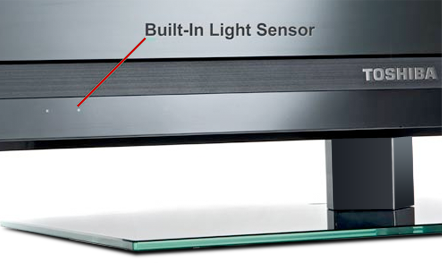
Our recommendation? Try Autoview, which uses your Toshiba HDTV’s built-in light sensor, combined with an analysis of the video signal coming into your set, to optimize your TV’s backlighting for every scenario. In dimmer rooms, your set will lower the backlight to allow for darker colors to remain vibrant, and in more brightly lit rooms, your HDTV will kick up the backlight a bit to ensure picture clarity and quality.
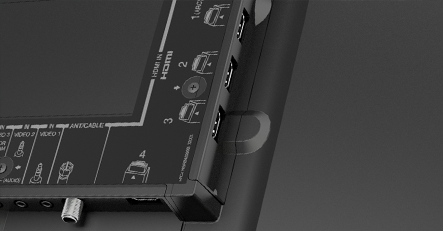
For the best image (and audio) quality, use an HDMI connection for your external devices when possible. A component connection’s the next-best (video only), with composite coming in a distant third.
Multiple presets allow you to select the best configuration for what you’re viewing, too. If you want to be able to distinguish every blade of grass in the stadium, choose the Sports preset, for example, which cranks the set’s brightness and contrast to their full values . Your Toshiba TV’s two Movie presets vary in the brightness of the display’s backlight, as well as their use of Toshiba DynaLight (localized backlight dimming for truer “black” representations) and dynamic contrast. Finally, Game mode sacrifices image processing to reduce lag between a video signal and the displayed picture, a must-have for perfect precision in rhythm games, for example.
« Check out the video to see how to access Autoview and other preset picture modes.
Basic Setting Adjustments
If you’re just looking for a way to make your television look better than its out-of-box, default configuration, but don’t have the ability to correctly calibrate your set with a disc (we’ll get to that in a bit), then exploring your HDTV’s presets can really shape up your set for the better. Toshiba’s sets come with a number of different configurations to match either your media or your viewing preferences:
« Check out the video below to find out how to access them, and what some of their many differences might be.
Advanced Display Configuration
Calibrating an HDTV sounds difficult on paper, but it’s a relatively simple process that gives you maximum control for setting up your picture exactly as it was intended to appear.
« For a visual guide to accompany our walkthrough, check out the video.
We used the Digital Video Essentials HD Basics Blu-ray disc to generate the test patterns for our calibration, but you can also use a typical calibration program you might find on the disc of one of your favorite movies. To start, pull up your calibration disc’s grayscale bars and manually adjust your set’s brightness all the way to its lowest setting. Slowly increase the value until you can just barely see the black bars with the lowest intensity values on your grayscale test.
A similar test using the highest-intensity values (approaching pure white) is used to set your HDTV’s proper contrast. You’ll want to crank up your HDTV’s contrast, and then slowly dial it back until you can just barely perceive a difference between what appears to be “all white” and the next-lowest value.
Setting a display’s color values correctly is difficult to do just by “eyeballing” it. Our calibration disc came with physical filters representing the correct red, green, and blue values an HDTV should display. We held each shade over our eyes and adjusted each color’s saturation on our Toshiba HDTV (thanks to its built-in ColorMaster mode) until they matched the physical filter.
« So, how did our intense, manual calibration stack up against Toshiba’s built-in presets? Take a look!
A Perfect Picture in Minutes
You don’t have to be an expert on color calibration to achieve a strong picture for your high-def television. You just have to know the basics: Where to put your HDTV, how to work its presets, and how to employ a few advanced tweaks to create a gorgeous display. Your HDTV, your eyes, and your movie night guests will thank you.